
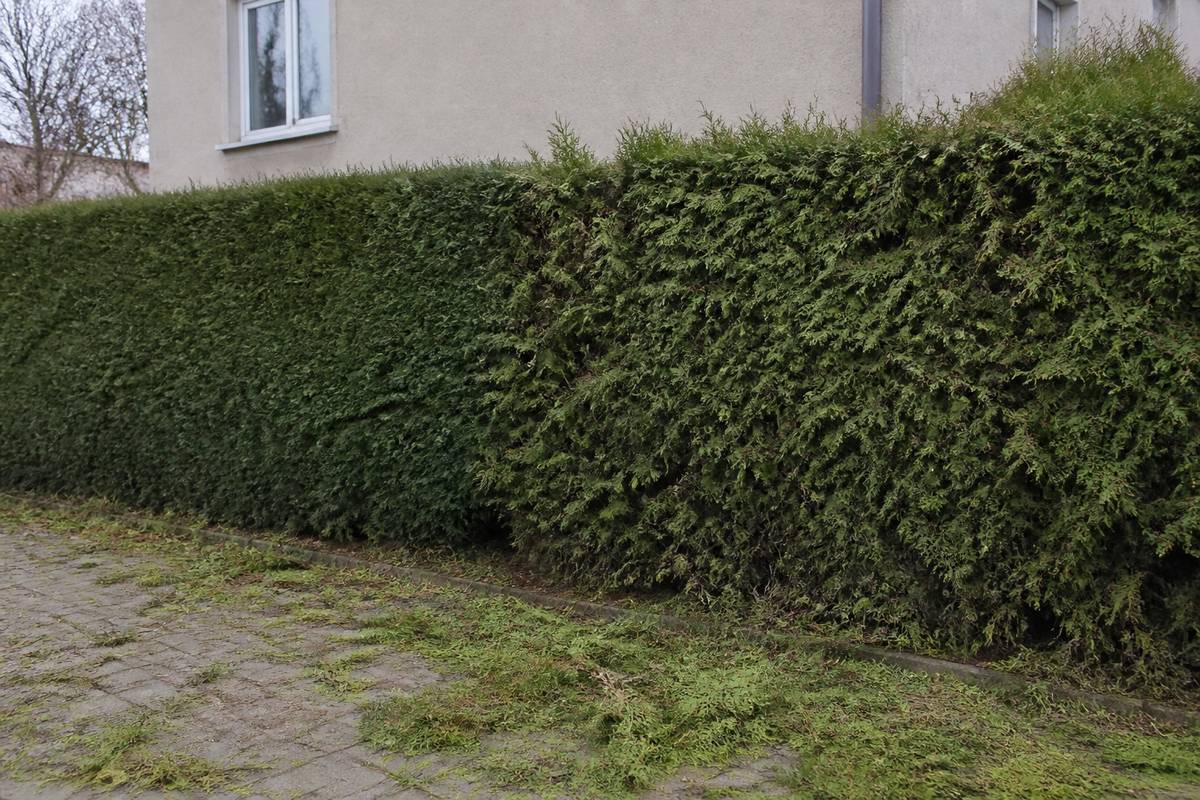
The essential rule
On thuja — and equally on yew-like conifers, cypresses and spruce — the live buds are only in the green, foliage-bearing outer layer. Inside, the branches are bare brown wood. Cut back into the brown wood and it will not regrow — there are no buds there to grow from. A brown patch or a brown edge stays that way for the rest of the plant's life. The only thing that can happen is that neighbouring branches gradually cover it — and that takes years, if it happens at all.
Almost everything else follows from that single fact. A thuja hedge has to be maintained regularly — every year, lightly, within the green layer only. Kept that way, a hedge looks good for decades. A hedge left unmaintained becomes a problem with no quick solution.
Deciduous hedges — hedging lime, hornbeam, honeysuckle, hawthorn, maple — are the opposite case: they regrow well from old wood and can be cut much more freely. So before starting we always establish what the hedge is made of.
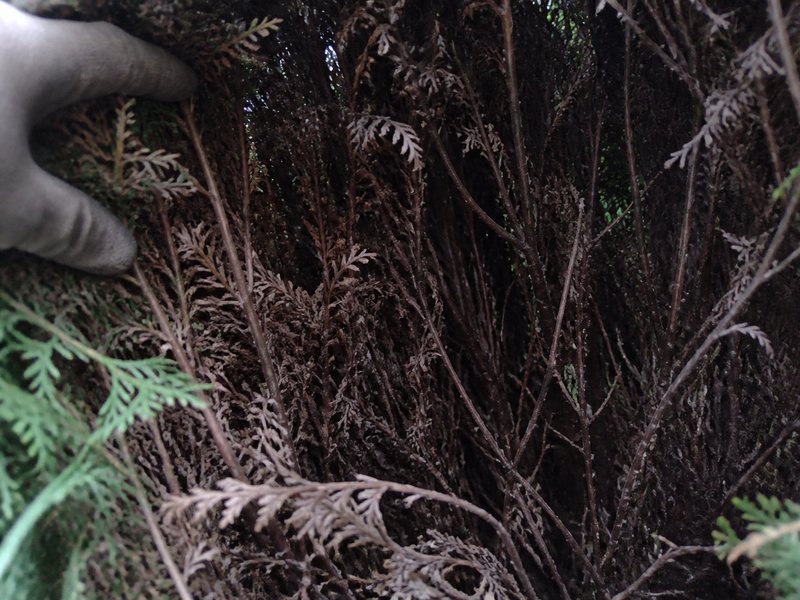
Regular maintenance — how it is done properly
- Cut only this year's and last year's growth. In practice that means the shears never go deeper than the green surface.
- Leave a little more each year than you take off. Over time the hedge grows slowly wider and taller — that is normal and correct. Cutting to exactly the same line every year ends up in the brown wood.
- Sides on a slight batter, narrower at the top than at the base. Light then reaches the bottom of the hedge as well. A hedge cut dead vertical grows barer at the base every year, because the top shades it.
- Limit the height early. Once a hedge reaches the height you want, start cutting the top every year. If you don't and the hedge reaches three metres, taking it back to two means cutting into brown wood — and the top will then stay brown.
Browning inside, and other causes
Brown patches in a hedge do not always mean disease. The commonest causes:
- Lack of light. The most frequent one. Branches left deep in shade — inside the hedge and at the base — shed their foliage naturally. It is not damage, but it is equally irreversible.
- Planted too densely. Thujas planted too close crowd one another and the inner faces die back.
- Drought. Thuja has a shallow root system. In a dry summer, especially on sandy soil or along a wall, thujas suffer first and yellow quickly on the inside.
- Salt and snow. Along roads and pavements, salt scorches the side of the hedge facing the road. Wet snow splays the branches outwards and leaves the hedge open down the middle.
- Diseases and pests. Thujas are prone to fungal shoot dieback and to leaf miners. These can be treated, but you have to know what you are dealing with first — spraying without a diagnosis is pointless. There is more on this in our section on tree diseases and pests.
What to do with an overgrown hedge
At this point there is no good solution — only a choice between several less good ones. We set them all out honestly:
Gradual reduction over several years
Each year you take a little more than usual, but stay within the green layer. Over several years the hedge becomes about a fifth more compact. Slow, but the hedge stays green throughout.
One side per year
One side is cut back hard — accepting that it will go brown — while the other is left untouched. Once the brown side has partly been covered by neighbouring growth a few years later, the other side is done. This method only works where the brown side is out of sight for a few years, against a neighbour's fence for instance.
Taking the top off
The height can be reduced, and the new cut face will not regrow, but the top is covered over time by the sides if they are green. The result is a flat-topped hedge — acceptable if the base and sides are in good condition.
Replacement
If the inside of the hedge is already bare brown wood with green only at the tips, no amount of trimming will put it right. The practical answer then is to take the old one out and plant a new one. A new hedge, planted at the right spacing and maintained from the start, will achieve within a few years what a spoiled hedge will never reach again.
Which option to choose depends on how far the process has gone and how important it is that the hedge stays opaque throughout. We tell you once we have looked at the hedge — including when our judgement is that replacement will be cheaper and better than the struggle.
When to trim
- The main trim — late spring, once the new growth has extended and hardened off in colour. You can then see how much may be taken, and the cut looks good immediately.
- A second, lighter trim — in summer, in July or early August, if the hedge needs a crisp outline. It is not always necessary.
- What we avoid: hard frost — frozen foliage and shoots shatter and the cut edge goes brown; and heat with direct glaring sun in high humidity, when freshly exposed inner foliage scorches.
- Late autumn is best avoided: new growth no longer has time to ripen before winter.
Nesting season is a separate matter. Hedges are a favourite nesting site for birds, and in spring we check them before starting work. If a nest is occupied, we leave that section and come back later. More on seasonality — when to prune trees.
What we do with the clippings
Trimming a hedge produces a surprisingly large volume of fine material. We gather it up and take it away — even when the hedge is a long one. If the volume is large, we chip it on site and take the chip away rather than leaving it in a heap in your garden.
What the price depends on
The length and height of the hedge, how many sides have to be worked, whether the height calls for ladders or a platform, how long it is since the hedge was last maintained, and the volume of clippings collected. A regularly maintained hedge is appreciably cheaper than one untouched for several years — this is one of the few jobs where regularity directly reduces the cost. If the hedge is long and you would like it maintained every year without having to arrange it each time, it can be set up as a maintenance contract. We explain the factors on the prices page.